Your enterprise containers orchestrator in the cloud: deploying OpenShift on Azure

openshift_azure

In a “containerized” world running “cloud native” applications, there is the need for a containers orchestrator as Kubernetes which is the best open source platform providing such features. Furthermore, Red Hat pushed this project to an enterprise-grade level developing OpenShift (on top of Kubernetes) adding more powerful features in order to simplify the applications development pipeline. Today, thanks to this platforms, you can easily move your containerized applications (or microservices based solutions) from an on-premise installation to the cloud without changing anything on the development side; it’s just a matter of having a Kubernetes or OpenShift cluster up and running and moving your container from one side to the other.

As already announced during the latest Red Hat Summit in San Francisco, in order to improve the developers experience, Red Hat and Microsoft, are working side by side for providing a managed OpenShift service (as it is already available for Kubernetes with AKS); you can read more about this effort here.

But … while waiting for having this awesome and really easy solution, what’s the way for deploying an OpenShift cluster on Azure today?

Microsoft is already providing some good documentation for helping you on doing that for both the open source OKD project (Origin Community Distribution of Kubernetes, formerly known as OpenShift Origin) and the Red Hat productized version named OCP (OpenShift Container Platform) if you have a Red Hat subscription. Furthermore, there are two different GitHub repositories which provide templates for deploying both: the openshift-origin and the openshift-container-platform.

In this blog post, I’d like to describe my personal experience about deploying OKD on Azure trying to summarize and explain all the needed steps for having OpenShift up and running in the cloud.

Get the Azure template

First of all, you have to clone the openshift-origin repository, available under the Microsoft GitHub organization, which provides the deployment template (in JSON format) for deploying OKD.

git clone https://github.com/Microsoft/openshift-origin.git

Because the master branch contains the most current release of OKD with experimental items, this may cause instability but includes new things. For this reason, it’s better switching to one of the branches for using one of the stable releases, for example, the 3.9:

git checkout -b release-3.9 origin/release-3.9

This repository contains the ARM (Azure Resource Manager) template file for deploying the needed Azure resources, the related configurable parameters file and the Ansible scripts for preparing the nodes and deploying the OpenShift cluster.

You will come back to use the artifacts provided in this repository later because there are some other steps you need to do as prerequisites for the final deployment.

Generate SSH key

In order to secure access to the OpenShift cluster (to the master node), an SSH key pair is needed (without a passphrase). Once you have finished deploying the cluster, you can always generate new keys that use a passphrase and replace the original ones used during initial deployment. The following command shows how it’s possible using the ssh-keygen tool on Linux and macOS (for doing the same on Windows, follow here).

ssh-keygen -f ~/.ssh/openshift_rsa -t rsa -N ''

The above command will store the SSH key pair, generated using the RSA algorithm (-t rsa) and without a passphrase (-N ”), in the openshift_rsa file.

01_ssh_keygen

In order to make the SSH private key available in the Azure cloud, we are going to use the Azure Key Vault service as described in the next step.

Store SSH Private Key in Azure Key Vault

Azure Key Vault is used for storing cryptographic keys and other secrets used by cloud applications and services. It’s useful to create a dedicated resource group for hosting the Key Vault instance (this group is different from the one for deploying the OpenShift cluster).

az group create --name keyvaultgroup --location northeurope

Next step is to create the Key Vault in the above group.

az keyvault create --resource-group keyvaultgroup --name keyvaultopenshiftazure --location northeurope --enabled-for-template-deployment true

The Key Vault name must be globally unique (so not just inside the just created resource group).

Finally, you have to store the SSH key into the Key Vault for making it accessible during the deployment process.

az keyvault secret set --vault-name keyvaultopenshiftazure --name openshiftazuresecret --file ~/.ssh/openshift_rsa

Create an Azure Active Directory service principal

Because OpenShift communicates with Azure, you need to give it the permissions for executing operations and it’s possible creating a service principal under Azure Active Directory.

The first step is to create the resource group where we are going to deploy the OpenShift cluster. The service principal will assign the contributor permissions to this resource group.

az group create --name openshiftazuregroup --location northeurope

Finally, the service principal creation.

az ad sp create-for-rbac --name openshiftazuresp --role Contributor --password mypassword --scopes /subscriptions//resourceGroups/openshiftazuregroup

From the JSON output, it’s important to take a note of the appId field which will be used as aadClientId parameter in the deployment template.

02_create_sp

Customize and deploy the Azure template

Back to the openshift-origin GitHub repository, we have cloned before, the azuredeploy.parameters.json file provides all the parameters for the deployment. All the corresponding possible values are defined in the related azuredeploy.json file.

This file defines the deployment template and it describes all the Azure resources that will be deployed for making the OpenShift cluster such as virtual machines for the nodes, virtual networks, storage accounts, network interfaces, load balancers, public IP addresses (for master and infra node) and so on. It also describes the parameters with the related possible values.

Taking a look at the parameters JSON file there are some parameters with a “changeme” value. Of course, it means that we have to assign meaningful values to these parameters because they make the main customizable part of the deployment itself:

  • openshiftClusterPrefix: a prefix used for assigning hostnames for all nodes – master, infra and nodes.
  • adminUsername: admin username for both operating system login and OpenShift login
  • openshiftPassword: password for the OpenShift login
  • sshPublicKey: the SSH public key generated in the previous steps (the content of the ~/.ssh/openshift_rsa.pub file)
  • keyVaultResourceGroup: the name of the resource group that contains the Key Vault
  • keyVaultName: the name of the Key Vault you created
  • keyVaultSecret: the Secret Name you used when creating the Secret (that contains the Private Key)
  • aadClientId: the Azure Active Directory Client ID you should have noted when the service principal was created
  • aadClientSecret: the Azure Active Directory service principal secret/password chosen on creation

Other useful parameters are:

  • masterVmSize, infraVmSize and nodeVmSize: size for VMs related to the master, infra and worker nodes
  • masterInstanceCount, masterInstanceCount and masterInstanceCount: number of master, infra and worker nodes

All the deployed nodes run CentOS as the operating system.

Instead of replacing the values in the original parameters file, it’s better making a copy and renaming it, for example, as azuredeploy.parameters.local.json.

After configuring the template parameters, it’s possible to deploy the cluster running the following command from inside the GitHub repository directory (for using the contained JSON template file and the related parameters file).

az group deployment create -g openshiftazuregroup --name myopenshiftcluster --template-file azuredeploy.json --parameters @azuredeploy.parameters.local.json

This command could take quite a long time depending on the number of nodes and their size and at the end, it will show the output in JSON format from which the two main fields (in the “outputs” section) are:

  • openshift Console Url: it’s the URL of the OpenShift web console you can access using the configured adminUsername and openshiftPassword
  • openshift Master SSH: contains information for accessing to the master node via SSH
  • openshift Infra Load Balancer FQDN: contains the URL for accessing the infra node

In order to access the OpenShift web console, you can just copy and paste the “openshift Console Url” value in your preferred browser.

03_openshift_console

In the same way, you can access the OpenShift master node by just copying and pasting the “openshift Master SSH” value in a terminal.

Once on the master node, you can start to use the oc tool for interacting with the OpenShift cluster, for example showing the available nodes as follows.

04_master_ssh

You can notice that these URLs don’t have really friendly names and it’s because the related variables in the template for defining them are:


"infraLbPublicIpDnsLabel": "[concat('infradns', uniqueString(concat(resourceGroup().id, 'infra')))]",

"openshiftMasterPublicIpDnsLabel": "[concat('masterdns', uniqueString(concat(resourceGroup().id, 'master')))]"

Conclusion

Nowadays, as you can see, following a bunch of simple steps and leveraging the Azure template provided by Microsoft and Red Hat, it’s not so difficult to have an OpenShift cluster up and running in the Azure cloud. If you think about all the resources that need to be deployed (nodes, virtual network, load balancers, network interfaces, storage, …), the process really simplifies the overall deployment. Of course, the developers’ life will be easier when Microsoft and Red Hat will announce the managed OpenShift offer.

Having an OpenShift cluster running in the cloud it’s just the beginning of the fun … so, now that you have it … enjoy developing your containerized applications!

Apache Kafka on Kubernetes and OpenShift : Barnabas is died … long life to Strimzi !

Almost one year and half ago, I started my journey about running Apache Kafka on Kubernetes and OpenShift. At that time, these containers orchestration platforms were focused on “stateless” (micro)services so there wasn’t a real support for a technology like Apache Kafka which is “stateful” by definition.

I wrote this blog post about my “investigation”, highlighting the problems to address in order to have Apache Kafka running on such a platforms. The solution was trying to “mimic” something that would have been added in the following months : the PetSets (then renamed in StatefulSets).

I created a new project named “Barnabas” (the name came from a character in a Franz Kafka novel; he was a messenger) with the objective to help developers on having resources (i.e. all needed YAML files) for deploying Apache Kafka on Kubernetes and OpenShift.

I got few people using “Barnabas” for their demos and proofs of concept receiving feedback and improvements; for example the Debezium team started to use it for deploying Apache Kafka with their supported Kafka Connect connectors; some people from the Aerogear project used it for some POCs as well.

Barnabas is died … long life to Strimzi !

Today … “Barnabas” isn’t here anymore 😦

It’s sad but it’s not so true ! It just has a new name which is Strimzi !

strimzi

The objective here is always the same : providing a way to run an Apache Kafka cluster on Kubernetes and OpenShift. Of course, the project is open source and I hope that a new community can be born and grow around it : today I’m not the only one contributor and that’s great !

The current first early release (the 0.1.0) provides all the YAML resources needed for deploying the Apache Kafka cluster in terms of StatefulSets (used for the broker and Zookeeper nodes), Services (for having the nodes able to communicate each other and reachable by the clients), Persistent Volume Claims (for storing Kafka logs other then supporting “ephemeral” storage with emptyDir) and finally metrics support in order to get metrics data from the cluster through Prometheus and showing them in a Grafana dashboard.

Selection_011

Other than that, Strimzi provides a way for deploying Kafka Connect as well alongside a Kafka cluster. In order to simplify the addition of new connectors when running on OpenShift, the deployment leverage some unique OpenShift features like “Builds” and “S2I” images.

The future … is bright

While the current release already provides a simple way to deploy the Apache Kafka cluster (“templates” are also provided in the OpenShift use case) the future is rich of improvements and features we’d like to add.

First of all, we are working on not having these YAML resources anymore but using the “operator” approach (well known in the Kubernetes world).

Two main components will be part of such an approach in a short time : a cluster controller and a topic controller.

The cluster controller, running on Kubernetes (OpenShift), is in charge to deploy an Apache Kafka cluster based on the configuration provided by the user through a “cluster” ConfigMap resource. Its main work is to watch for a ConfigMap which contains the cluster configuration (i.e. number of broker nodes, number of Zookeeper nodes, healthcheck information, broker configuration properties, metrics configuration and so on) and then deploying the cluster based on such information. During its life, the cluster controller is also in charge to check updates on the ConfigMap and reflecting the changes on the already deployed cluster (i.e. the user increase the number of broker nodes in order to scale up the cluster or change some metrics parameters and so on).

The topic controller, always running on Kubernetes (OpenShift), provides a way to manage the Kafka topics without interacting with the Kafka brokers directly but using a ConfigMap approach. In the same way as the cluster controller, the topic controller is in charge to watch for specific ConfigMap resources which describe topics : this mean that a user can create a new ConfigMap containing topic information (i.e. name, number of partitions, replication factor and so on) and the topic controller will create the topic in the cluster. As already happens with the cluster controller, the topic controller is also in charge to check updates on the “topic” ConfigMap reflecting its changes to the cluster as well. Finally, this component is also able to handle scenarios where topics changes don’t happen on the ConfigMap(s) only but even directly into the Kafka cluster. It’s able to run a “3-way reconciliation” process in order to align topic information from these different sources.

Conclusion

Having these two components will be the next step for Strimzi in the short term but more improvements will come related to security, authentication/authorization and automatic cluster balancing where, thanks to the metrics, a cluster balancer will be able to balance the load across the different nodes in the cluster re-assign partitions when needed.

If you want to know more about the Strimzi project, you can engage with us in different ways, from IRC to the mailing list and starting following the official Twitter account. Thanks to its open source nature you can easily jump into the project providing feedback or opening issues and/or PRs … becoming a new contributor !

Looking forward to hear from you ! 😉

Reactive streams ? AMQP 1.0 is a really good “reactive” protocol !

Header

During the just passed Christmas holidays, I decided to spend the spare time for digging into the reactive programming paradigm, the “Reactive streams” manifesto and the related ReactiveX implementation (more specifically on the RxJava one).

This blog post doesn’t mean to be a discussion about what reactive streams are or what reactive programming is just because you can find a lot of really useful resources on these arguments on the Internet but, because I’m a messaging and IoT guy, during this article I’ll try to describe some (really trivial) thoughts I had “discovering” the reactive streams API  and comparing them to the AMQP 1.0 protocol.

On December 30th, I tweeted …

Selection_004

As you can see, I defined AMQP 1.0 as a “reactive” protocol because I really found all the semantics and the related definitions from the reactive streams API in the AMQP 1.0 specification.

What I’m going to describe is a mapping at 20,000 feet without digging into all the possible problems we can encounter doing that, just because it seemed rather trivial to me; I’d like to open a discussion on it or giving inputs to the other people for thinking about that.

It could be useful when it comes to use a reactive programming model in a microservices based system where a “good” messaging protocol for supporting such a model is needed.

The Reactive Streams API

We know that AMQP 1.0 is really a peer-to-peer protocol so we can establish a communication between two clients directly or using an intermediary (one or more) such as a broker (for allowing store-and-forward) or a router (providing direct-messaging as well). In all these use cases, it’s always about having a “sender” and a “receiver” which can be just mapped to a “publisher” and a “subscriber” in reactive streams API terms (if you think about ReactiveX, then you know them as “observable” and “observer”).

The reactive streams API are defined with four main interfaces with some methods which can be mapped in terms of specific AMQP 1.0 “performatives”.

public interface Processor<T, R> extends Subscriber<T>, Publisher<R> {}

public interface Publisher<T> {
    public void subscribe(Subscriber<? super T> s);
}

public interface Subscriber<T> {
    public void onSubscribe(Subscription s);
    public void onNext(T t);
    public void onError(Throwable t);
    public void onComplete();
}

public interface Subscription {
    public void request(long n);
    public void cancel();
}

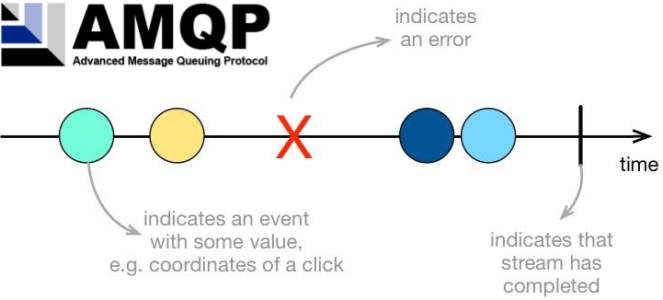
The above interfaces describes how a “subscriber” can subscribe in order to receive stream of events published by a “publisher” and how this one “pushes” events to the subscriber. The API also defines how it’s possible to for the subscriber to avoid being overwhelmed by events if it’s slower than the publisher, using a “request for events” mechanism on the subscription. Finally, the subscriber can be notified when the stream is completed (if it’s not infinite) or if an error occurred.

During this post I won’t consider the Processor interface which enables an entity to be both a “publisher” and “subscriber” and it’s mainly used for implementing “operators” in the stream processing chain.

Attaching as … subscribing

The Publisher interface provides a subscribe method which is called by the subscriber when it wants to start receiving all the published events on the related stream (in a “push” fashion).

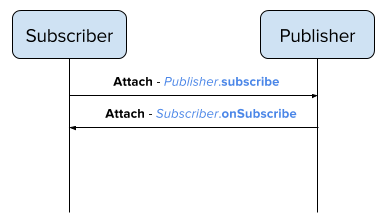
If we assign a name to the stream which could be an “address” in AMQP terms, then such an operation could be an “attach” performative sent by the subscriber which acts as a receiver on the established link. In the opposite direction, the publisher can reply with an “attach” performative (on the same address) acting as a sender and this operation could be mapped as the onSubscribe method call on the Subscriber interface.

FIG1

FIG.1 – attach as Publisher.subscribe, Subscriber.onSubscribe

Credits based flow control and transfer … for back-pressure and pushing events

One of the main reactive streams concepts which convinced me that AMQP is really a “reactive” protocol was the back-pressure. It provides a way for handling scenarios where a subscriber is slower than the publisher avoiding to be overwhelmed by a lot of events it can’t handle (losing them); the subscriber can notify to the publisher the maximum number of events it can receive. In my mind it’s something that AMQP provides out-of-box with the credits based flow control (something that it’s not available with the MQTT 3.1.1 protocol for example).

In terms of reactive streams API, such a feature is provided by the Subscription interface with the request method; calling this method, the subscriber says the maximum number of events to the publisher. In AMQP terms, it means that the receiver sends a “flow” performative specifying the credits number as the maximum number of messages it can handle in a specific moment in time.

At this point, the publisher can start to push events to the subscriber and it’s available through the onNext method call on the Subscriber interface. Even in this case, in AMQP terms, the sender starts to send one or more “transfer” performatives to the receiver with the message payload (representing the event).

FIG2

FIG.2 – flow as Subscription.request(n) and transfer as Subscriber.onNext

Detaching … for cancelling, completed streams or errors

In order to complete this 20,000 feet mapping, there are few other methods provided by the reactive streams API I haven’t covered yet.

First of all, the subscriber can decide to not receiving events anymore calling the cancel method on the Subscription interface which in AMQP terms could be a simple “detach” performative sent by the receiver during the “normal” messages (events) exchanges.

FIG3

FIG.3 – detach from receiver as Subscription.cancel

Finally, it’s important to remember that the reactive streams API takes into account finite streams of events and errors as well.

Regarding finite streams of events, the Subscriber interface exposes the onComplete method which is called when the publisher hasn’t no more events to push anymore so the streams is completed. In AMQP, it could mean a “detach” performative sent by the sender without any error conditions.

FIG4

FIG.4 – detach from sender as Subscriber.onComplete

At same time, the reactive streams API defines a way to handle errors without catching exceptions but handling them as a special events. The Susbcriber interface provides the onError method which is called when an error happens and the subscriber is notified about that (in any case such an error is represented by a Throwable specific implementation). In AMQP, it could mean a “detach” performative sent by the sender (as it happens for a completed stream) but, this time, with an error condition providing specific error information.

FIG5

FIG.5 – detach from sender as Subscriber.onError

Conclusion

Maybe you could have a different opinion (and I’d like to hear about that) but, at a first glance, it seemed to me that AMQP 1.0 is really THE protocol suited for implementing the reactive streams API and the related reactive programming paradigm when it comes to microservices in a distributed system and how to design their communication in a reactive way. It provides the main communication patters (request/reply but mainly publish/subscribe for this specific use case), it provides flow-control for the back pressure as well. It’s a really “push” oriented protocol compared to the “pull” HTTP nature for example. MQTT could be another protocol used in a reactive fashion but it lacks of flow-control (at least in the current 3.1.1 specification).

IoT weekend 2017 : my session about messaging and IoT … video and slides !

iot_weekend

Today I had a really interesting experience thanks to Jorge Maia who, few weeks ago, invited me to have a session for the online Brazilian event IoT Weekend.  Of course, I accepted his invitation in order to speak about “Open sourcing the messaging and IoT” focusing on IoT protocols, patterns and related platforms like EnMasse and Eclipse Hono.

The event is still going on while I’m writing this blog post (for all this weekend) but my session ended less than one hour ago so I’d like to share the material for all the attendees and for the other people who lose the session and could be interested to watch it !

So you can find the video on YouTube here and the slide deck on SlideShare here.


We can have more … EnMasse !

This morning, my working day started in a different way with an interesting news from AWS re:Invent 2017, the annual Amazon conference …

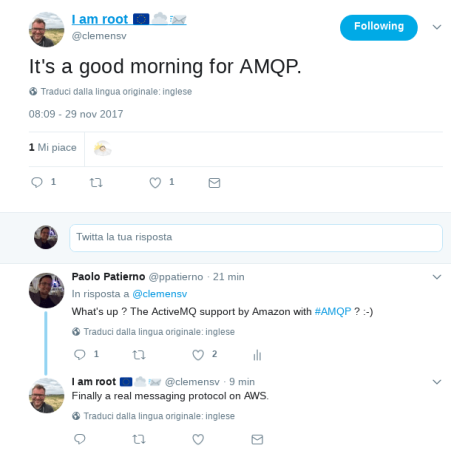
The news was about Amazon MQ, a new managed message broker service based on ActiveMQ 5.x with all the goodies that it provides in terms of supported protocols like MQTT, JMS, STOMP, … and … yes … AMQP 1.0 !

It seems that this news made Clemens Vaster (from Microsoft) happy as well 🙂

Selection_078

Finally, even Amazon added support for a “real” messaging protocol which is enterprise ready and from my point of view … even IoT ready 🙂

Taking a look to the blog post about this new service, another project came to my mind … guess what ? EnMasse !

We can have more : EnMasse !

What the AmazonMQ provides is the possibility to create a new broker instance and then accessing to the console, creating queues, topics and so on. It’s great but … we can have more !

For this reason I decided to write, for the first time, something about EnMasse even if I had a lot of sessions in different conferences in the past, speaking about it.

EnMasse is an open source “messaging as a service” platform which simplifies the deployment of a messaging infrastructure both “on premise” and in the Cloud. It provides scalability and elasticity in order to address all the problems we can have when the number of connected clients increases (and decreases) even reaching big numbers like in an IoT scenario.

It supports all the well-known messaging patterns (request/reply, publish/subscribe and competing consumers) and up today two main protocols, AMQP 1.0 and MQTT (but adding the HTTP support is on the road-map).

It provides multi-tenancy having different tenants sharing the same infrastructure but being isolated each other. Finally, it provides security in terms of using TLS protocol for establishing connections (with clients and between internal components) other than authentication using Keycloak as the identity management system.

Store and forward or … direct ?

One of the main features it provides is the support for two different messaging mechanisms, “store and forward” and “direct messaging”.

The “store and forward” mechanism is exactly what the messaging brokers provide today. The broker takes the ownership of the message sent by a producer before forwarding this message to a consumer which is asking for it (connecting to a queue or a topic on the broker itself). It means that “storing” the message is the first step executed by the broker and “forwarding” is the next one which can happen later, only when a consumer will be online for getting the message : it allows asynchronous communication between clients and time decoupling. There is always a double contract between produce-broker and broker-consumer, so that the producer knows that the messages reached the broker but not the consumer (a new messages exchange on the opposite direction is needed for having something like an “acknowledgement” from the consumer).

The “direct messaging” mechanism is not something new because it means having a sort of “direct” communication between clients, so that the producer is able to send the message only when the consumer is online with a single contract between the parties : when the producer receives the “acknowledgement”, it means that the consumer has got the message. Of course, EnMasse provides this mechanism in a reliable way : it uses an AMQP 1.0 routers network (connected in a mesh) so that clients aren’t really connected in a direct way but through this mesh. Every router, unlike a broker, doesn’t take ownership of the message but just forwards it to the next hop in the network in order to reach the destination. When a router crashes, the network is automatically re-configured in order to determine a new path for reaching the consumer; it means that high availability is provided in terms of “path redundancy”. Furthermore, thanks to the AMQP 1.0 protocol, a producer doesn’t receive “credits” from a router to send messages if the consumer isn’t online or can’t process more messages.

EnMasse provides these messaging mechanisms using two open source projects : Apache Qpid Dispatch Router, for the router network, and ActiveMQ Artemis (so ActiveMQ 6.x and not 5.x like in the AmazonMQ) for the brokers side.

enmasse_overall_view

I want to know only about “addresses” !

Comparing to the new AmazonMQ service, from a developers point of view, the interesting part is the abstraction layer that EnMasse adds to the underlying messaging infrastructure. You can create a new “address” using the console and specifying a type which can be :

  • queue : backed by a broker, for “store and forward” and for providing competing consumer pattern, asynchronous communication and so on.
  • topic : backed by a broker, for “store and forward” as well but for providing publish/subscribe pattern.
  • anycast : it’s something like a queue but in terms of “direct messaging”. A producer can send messages to such an address only when one or more consumers are listening on it and the routers network will deliver them in a competing consumer fashion.
  • multicast : it’s something like a topic but in terms of “direct messaging”, having a producer publishing messages to more consumers listening on the same address so that all of them receive the same message.

Selection_081

The developer doesn’t have to worry about creating the broker, configuring the routers and so on; using the console and a few simple steps in the wizard, he will have a usable “address” for exchanging messages between clients.

Selection_082

Good for microservices …

The interesting part of having the supported “direct messaging” mechanism is even, but not only, about the “micro-services” world. EnMasse can be used as a messaging infrastructure for handing request/reply and publish/subscribe between micro-services using an enterprise protocol like AMQP 1.0.

You can read more about building an AMQP 1.0 based API and a micro-services infrastructure in this article written by on of my colleague, Jakub Scholz.

Who orchestrate ? OpenShift and Kubernetes

Another aspect which makes EnMasse more appealing than other solutions is that it’s totally containerized and runs on the main containers orchestration platforms like Kubernetes and the enterprise OpenShift (using the OpenShift Origin project as well). It means that your messaging based (or IoT) solution can be deployed “on promise” and then easily moved to the Cloud without any changes to your applications (maybe just the addresses for establishing the connections from the clients).

Selection_079

Conclusion

Of course, this blog post didn’t mean to be an exhaustive guide on what EnMasse is but just a brief introduction that I wanted to write for a long time. The Amazon news gave me this opportunity for showing you that you can really have more than just creating a broker in the Cloud and taking care of it 🙂


Eclipse Hono : Virtual IoT meetup

Virtual IoT - Hono

Yesterday, thanks to the Eclipse Foundation I had the chance to talk about Eclipse Hono as speaker for this virtual IoT meetup as part of a meetup series where the focus is on the Eclipse IoT projects. I was with Kai Hudalla (Chief Software Architect at BoschSI) who is co-lead and main contributor on Hono.

It was my first virtual meetup and a really exciting experience for me with almost 90 “virtual” attendees and a lot of interesting questions showing the interest that developers had about this “new” project.

If you didn’t have a chance to watch the session or you want to re-watch it, you can find the recording on YouTube; the slides deck is available here as well.

Eclipse Day Milan 2017 : speaking about Eclipse Hono !

Last Friday, September 22nd, I was in Milan for the first Eclipse Day !

It was a really great event with a good number of attendees (there were about 100 people) following sessions from italian and international speakers.

I had my session speaking about Eclipse Hono, digging into its architecture, its API and what it provides today for building IoT solutions. Of course, having an open source platform for the Internet of Things gets a lot of interest from developers.

Being in Milan gave me the chance to meet some colleagues from the Red Hat office as well 🙂

You can find the slides about my session here.

 eclipseday_02 eclipseday_03

eclipseday_04

eclipseday_05 eclipseday_06


GnatMQ : a more community driven future !

When I developed the M2Mqtt library, a lot of people asked me to develop a .Net based MQTT broker as well. It wasn’t my initial intention but at same time I thought that it could be a good idea trying to reuse part of the M2Mqtt client in order to do that : this is the way how GnatMQ was born.

From the beginning I said that it wasn’t a production ready MQTT broker with decent performance for its job but in the last years it turned out that a lot of developers started to use it for their IoT solutions.

Due to my last really busy year and pushed by this issue opened in the GnatMQ repo, this week I decided to create a GnatMQ organization and making this broker more open source then before. I added some developers who asked me to be member of such organization so that they can drive the GnatMQ future better than me : this members proved to contribute to the project in the past pushing PRs on it. Of course, I won’t give up on that, I will always feel like the project’s father and I’ll coordinate such community.

So … it means that GnatMQ isn’t dead … the community and the power of collaboration will move it to the next level, maybe having a really good fully .Net based MQTT broker !


EnMasse and Eclipse Hono ? Messaging and IoT ? I have some events for you !


events

Do you want to learn more about the EnMasse project ?

Do you want to learn the same for the Eclipse Hono project ?

Do you want to know more about their relationship and how they simplify the development and deployment of messaging and IoT solutions ?

Well … in the coming weeks my agenda will be packed of events about them. Let’s see !

Eclipse Day Milan 2017

On September 22nd there will be the Eclipse Day Milan 2017 and I’ll be there with the “Eclipse Hono : Connect. Command. Control.” session. What will you see there ?

The open source counterpart to closed and proprietary IoT solutions is called Hono ! Born out of the collaboration of big companies, including Red Hat and Bosch both members of the Eclipse Foundation, Hono is an open source framework which aims to add features, such as device management and authentication, on top of an highly scalable messaging infrastructure in order to guarantee secured data exchange between devices and cloud applications. Using its APIs, devices can send data (telemetry and event) and can be controlled remotely (command/control). During this session we will see the “bricks” that make its architecture, the exposed APIs and the integration with other solutions.

There will be a lot of other great sessions focused on the Eclipse Foundation ecosystem so I think that it will be a really awesome event !

Eclipse IoT Virtual meetup

The Eclipse Foundation hosts a lot of virtual meetups on IoT projects which are part of the foundation itself. Of course, Eclipse Hono is one of them !

On October 11st, I and Kai Hudalla (from Bosch Software Innovations) will have this meetup. We hope to reach a really huge “online” audience in order to show how Hono is a really powerful platform for connecting and control IoT devices at scale.

It will be simpler for you to be there … just take a seat at home !

JavaSI

On October 16th – 17th there will be the JavaSI conference organized by SIOUG.

I and my awesome team mate Ulf Lilleengen will be there with a session and a workshop.

First of all the “EnMasse : open sourcing the messaging and IoT” session as an introduction to the workshop.

Out there there are a lot of “closed” source products for developing messaging and IoT based solutions. What if you want to have more control on your platform ? EnMasse is the answer!

It’s a totally “open” source messaging-as-a-service platform which can be deployed on-premise, in the cloud or even in an hybrid scenario. At the same time it aims to be highly scalable in terms of throughput and the number of connections, based on standard protocols like AMQP 1.0 and MQTT and provides different patterns for messages exchange. Its nature makes EnMasse a great solution for IoT deployments in order to handle millions of connected devices for ingesting telemetry data and controlling them.

Then the “EnMasse – messaging and IoT in your hands” workshop speaking about the EnMasse project and how it’s really great for building messaging and IoT solutions.

Interested in messaging and IoT ? Kubernetes and OpenShift? In this workshop, we will dive into EnMasse, an open source Messaging-as-a-Service platform, built on top of Kubernetes and OpenShift. You will setup OpenShift or Kubernetes, deploy EnMasse, and build an end-2-end solution with edge devices, messaging, and analytics.

You will learn basic Kubernetes and OpenShift concepts as we go, and learn how you can use EnMasse to implement different messaging patterns in your application.

During this workshop you will touch messaging and IoT stuff with your hands !

MQTT v5 : what is on the way ?

“MQTT is a lightweight protocol for IoT” …. “MQTT lacks a lot of features” … and how many of other sentences you have heard speaking about MQTT with others developers ?

During the last year, the OASIS committee has worked a lot on the new MQTT v5 specification pushing the protocol to the next level in both directions : a lot of new features are coming and they will fill (part of) the gap that it has against other protocols which already provide them (my opinion is that, from some points of view, the new MQTT v5 is more AMQP-ish 🙂 ); on the other side, don’t tell me that MQTT is lightweight as before. Adding features means adding complexity making it heavier and maybe this is the reason why, today, a lot of IoT developers decide to not use AMQP for their projects … but repeating myself … more features mean more complexity and they are very welcome.

By the way, this blog post is about MQTT v5 and the new specification so … let’s start !

(the OASIS committee has opened a publish review and it will be opened until September 8th, you can find more information here if you want to read the entire specification. There is also a “Big ideas for MQTT v5” interesting document here with links to related issues on OASIS web site).

Why from 3.1.1 to 5 ?

A lot of people ask me why this “jump” from 3.1.1 to 5 ! The answer is in the protocol itself !

The CONNECT packet, which brings the connection information from the client to the broker, has a “protocol version” byte inside the variable header : it’s a single byte which provides the revision level of the protocol used by the client. With version 3.1 it was 3 then, moving to the current 3.1.1, it became 4. Starting to write the new specification, the committee decided to align the “marketing” version of the protocol with the “internal” representation on the wire : from 3.1.1 to 5 … so from “protocol version” 4 to 5 !

You can see it even as a really “huge” specification change as it really is in terms of new features.

Properties … not only payload

The “variable header” is changed and now it contains some properties and each property is defined as a key-value pair. Some property are fixed and used in specific packets like for example the “content-type” which describes the type of content in the payload (JSON, XML, …) and the “response topic” used in the new supported request/response pattern (as we’ll see in the next paragraphs). There is the possibility to add “user properties” as well so that the developer can add more key-value pairs for bringing values meaningful at application level : it’s an interesting feature because in some IoT solutions, it could be interesting not sending the payload at all but just values using properties. This aspect is confirmed by the fact that the payload for the PUBLISH message is defined as “optional” now while it’s “required” in the current 3.1.1 specification.

AMQP already had this kind of feature : system properties (i.e. content-type, reply-to, ttl, …) and application properties.

Error handling : now I know what’s really happened

One of the missing thing in the current 3.1.1 specification is the support for a proper “error handling” at application level : when there is an error, the server just shuts down the connection and the client doesn’t have any possibility to know the reason. In the new specification quite much all the packets have a single byte “reason code” as part of the “variable header”.

Alongside the “reason code” there is a “reason string” that can be used for providing a more human readable information about the error.

Such a feature is something that HTTP and AMQP already provided.

Flow control for QoS 1 and 2

Flow control is the main lacking feature in the current 3.1.1 specification … something that the AMQP protocol already had even at different levels (i.e. session window and credits on messages).

The new v5 specification adds a simple flow control based on the “receive maximum” property. With this property the client can limit the number of QoS 1 and 2 messages that it is willing to process concurrently : it defines a limit quota about the number of PUBLISH messages which can be sent without receiving the acknowledge. There is no flow control for QoS 0 messages because as we know there is no acknowledgement mechanism for that; the acknowledgment mechanism for QoS 1 and 2 is used by the server for avoiding sending messages to the client; so overwhelming a client with QoS 0 publications is still possible.

Request/Response pattern … here we are !

The MQTT protocol is well known for its publish/subscribe nature without any built-in support for request/response pattern. With 3.1.1 specification, there is no “standard” way for a requester to specify the topic where it expects to receive a response from a responder : it’s something that could be encoded inside the message payload. The new v5 introduces the “response topic” property (something that AMQP already had with the “reply-to” system property) : using such property, the requester has a “standard” way to specify the subscribed topic on which it expects replies from a responder.

Shared subscriptions

The normal way to work for MQTT is that the broker delivers a received message to ALL subscribers for the topic on which the message is published : today we can call them “non shared” subscriptions. The v5 specification adds the “shared subscription” concept : a subscription can be shared among different clients and the messages load will be spread across them. It means that the broker doesn’t just send the received message to all subscribers but to only one of them. Effectively, the clients are something like “competing consumers” on the shared subscription.

A shared subscription is identified using a special topic filter with following format :

$share/{ShareName}/{filter}

Where :

  • $share is needed for specifying that the subscription is shared
  • {ShareName} is the name of the subscription used for grouping clients (it sounds to me something like the “consumer group” in Apache Kafka)
  • {filter} is the topic filter and it’s already well known for “non shared” subscription

For example, imagine to have a publisher P sending messages on topic “/foo” and we have two different applications A1 and A2 which need to get messages published on this topic for executing different actions (i.e. monitoring, logging, …). Using “non shared” subscriptions we can just have A1 and A2 subscribing to the topic “/foo” and starting to receive messages from that. If the load on the topic increase and we want to leverage on the huge potential we have with a cloud native and containerized applications so that we could spread the load across multiple instances of applications A1 and A2, we can use the “shared” subscriptions in the following way.

From the single topic “/foo” we can move to have :

  • $share/A1/foo
  • $share/A2/foo

All the instances of application A1 can subscribe to the first subscription and the instances of A2 can subscribe to the second one.

In this way, the A1 instances are competing consumers for messages published on “/foo” and the same for A2 instances. We still have all messages published to both applications but the load is spread across different instances (of the same application) thanks to the “shared” subscription support.

Session management

With MQTT a session is represented by the subscriptions for a client and any queued messages (when the client isn’t online). In the 3.1.1 specification, the “clean session” flag is used by the client for specifiying that : the server would delete any existing session and would not save the new session (if set 1); the server would need to recover any existing session on client re-connection (if set 0) and save it on disconnection.

In the new v5, the behavior is changed. First of all the flag was renamed in “clean start” and if set to 1, it means that the broker would discard any previous session (the client is asking for a “clean” start) otherwise it would keep session (the client is asking for not “cleaning” the current session).

Other than this change, the “session expiry interval” property was added (in the CONNECT packet) : after the client disconnects, the broker should remove session information for that client when this time is elapsed.

Delete please, if you can’t delivery on time …

Another really interesting property is the “publication expiry interval” which can be set into the PUBLISH message by the client. It’s something similar a TTL (Time to Live), as it already exists in the AMQP protocol, and it means : if this time has passed and the server, for any reason, can’t deliver the message to subscribers then it MUST delete this copy of the message.

In the IoT, it’s really common to use this feature for the “command and control” pattern, in order to avoid that offline devices start to execute “stale” commands when they come back online : if the command isn’t executed in a specified amount of time, it should be never executed.

The new enhanced authentication

Today, with the 3.1.1 specification, the binary value 1111 for the higher nibble of the first byte in the “fixed header” is forbidden/reserved. It’s changed in v5 because it represents the new AUTH packet.

Other than using the already available username/password built-in authentication, the AUTH packet provides a way to use a different authentication mechanism between client and server for including challenge/response style authentication; it’s something that the AMQP protocol supports with SASL mechanism for example.

Let others know that I’m dead but … not immediately

The “Last Will and Testament” (LWT) is a really cool feature which gives the possibilities to interested clients to know that another client is dead (without sending a “clean” disconnection packet). In the new specification, it’s possible to specify a “will delay” so that when the server detects a “not clean” disconnection from a client, it doesn’t send the “will message” immediately but after such a delay.

Keep alive timeout ? Now the server can decide !

With current 3.1.1 specification, the client sends a “keep alive timeout” value (in seconds) to the server : it represents the maximum amount of time between two packets sent by the client. If it expires, the server can consider the client dead (so sending the related “will message” for example). Up today, the client decided this value (disabling keep alive with a 0 value) but with new v5, the server can provide a “keep alive timeout” value in the CONNACK packet for the client : it means that the client MUST use this value instead the one it sent in the CONNECT packet.

Miscellaneous

Password … but no username

It’s now possible to send a password in the CONNECT packet without specifying the corresponding username. This allows to use the “password” field for credentials and not just for password.

Maximum packet size

Using the corresponding property, the client can now specify the maximum packet size it can accept.

Pipelining messages

The client can now starts to send other messages before receiving the CONNACK after sending the CONNECT packet. Of course, it means that if the server is sending the CONNACK with a negative reason code, it MUST NOT process any messages already sent by client.

Pipelining is one of the features already provided by AMQP but in a really more powerful way.

What identifier have you assigned to me ?

We know that the client-id provided by the client on connection is really useful for maintaining the correlation with session information. It’s also allowed to connect providing a “zero length” client-id but in this case the server will assign such identifier to the client. Today, the client doesn’t receive such information from the server while with the v5, the server provides the assigned client-id using the CONNACK packet.

I can’t handle higher QoS

Using the “maximum QoS” property in the CONNACK packet, the server can provide the maximum QoS level that it can handle for published messages. It means that if the client sends a packet with an higher QoS, the server will disconnect and the cool thing, with v5 specification, is that it will do that not just closing the TCP connection but providing a specific reason code (QoS not supported) in the DISCONNECT packet.

From topic name to … alias

A lot of people say that MQTT is lightweight but they don’t think that the topic name is specified in every message sent by the client (it’s different from AMQP where the client “attaches” on an address after the connection and can publish without specifying it anymore). The v5 specification adds the concept of “topic alias” through the corresponding property : it seems to be stolen by MQTT-SN protocol which provides a way to assign a single byte identifier to a topic name, so that in the subsequent PUBLISH packets, the client can avoid to specify the entire topic name but can use such identifier instead (it reduces the packet size).